Text may contain bad spelling, incorrect expressions, verbal turns, sentence constructions, etc.
If you see this:

It should be something like this:
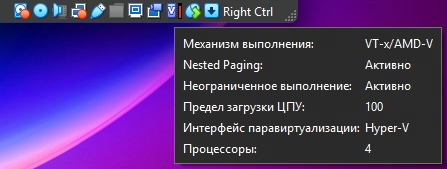
Look at native API and VT-x/AMD-V is key
So your virtual machine is running slow because it’s not using hardware virtualization of your CPU.
Slow running virtual machine on VirtualBox, this is a Windows virtualization issue and specifically due to Device Guard and Credential Guard on Windows 11.
In the case of Windows 11, even with virtualization disabled everywhere else, it’s not disabled unless Device Guard and Credential Guard are disabled, and this is unfortunately about security.
Windows kind of “takes over” virtualization, so other software can’t use it.
Windows 10 & 11
You need to disable anything related to virtualization, WIN + R –> “optionalfeatures”:
- Hyper-V
- Virtual Machine Platform
- Windows Hypervision Platform
- WSL
- and others, if any
If you have Windows 10, apply and reboot, everything should work. If you have Windows 11, click reboot later, then continue.
Windows 11
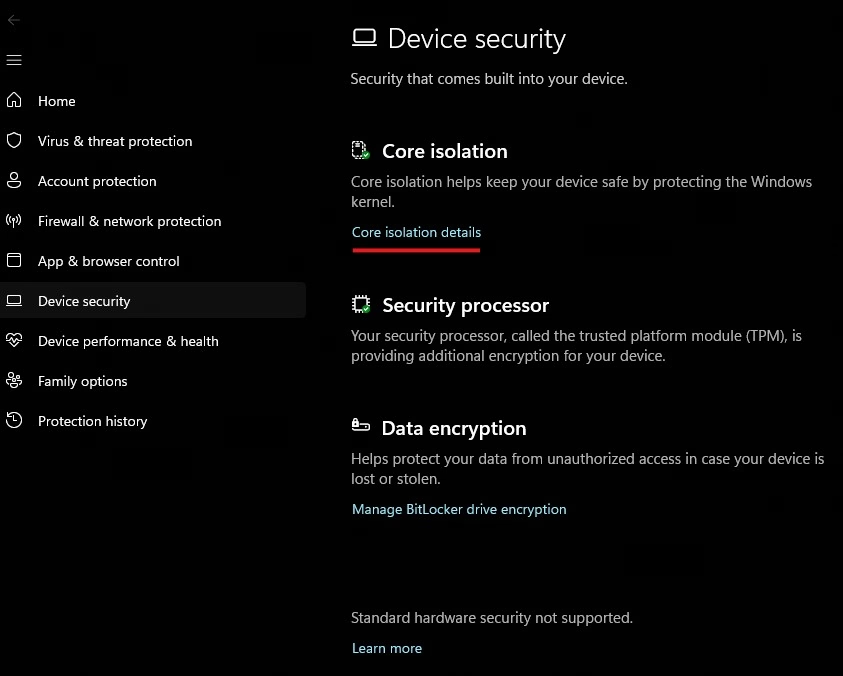
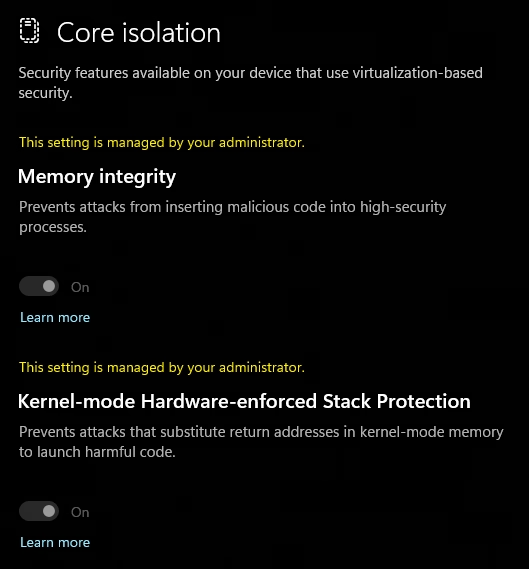
Settings –> Privacy & security –> Windows Security –> Device security –> Core Isolation, disable:
- Memory Integrity
- Kernel-mode Hardware-enforced Stack Protection
Screenshots


Next, download this utility from the official website. Open PowerShell as administrator:
| |
| |
Note the X.X, the version you downloaded should be there.
Reboot and follow the disabled instructions (it’s simple).
How to get it all back?
As above, but in reverse.
In the case of only Windows 11.
| |
And reboot.
WIN + R –> “msinfo32”, if “Secure Boot State” - “on” then scroll down to check. If “off”, then move on.
Boot into BIOS/UEFI:
- Disable Secure Boot if it says “Enabled”
- If it says “Standard” change to “Custom”
- Change “Custom” to “Standard” accepting Factory Defaults
- Enable Secure Boot
Note that before you enable Secure Boot, you should disable CSM. Given the fact that you’re reading this because you want to enable all back, and it won’t work without Secure Boot, you probably already have CSM disabled, but check anyway.
Also, if you’re on Windows 11 Pro, you can mess around with “gpedit.msc” if something didn’t work: Computer Configuration –> Administrative Templates –> System –> Device Guard –> Turn On Virtualization Based Security.
Check
How to check that everything is working. In “msinfo32” it will be “Secure Boot State” = on, “Virtualization-based security” (VBS) = Running.
| |
It’ll show something like:
| |
Not:
| |
“Credential-Guard is not running.” depends on hardware and support and all that. If it doesn’t work for you, it’s no big deal. It’s a cool thing, but alas, it’s designed for enterprise.
You can also check it with the command:
| |
More logs (by AI)
There’s an explanation here by AI, just for general knowledge I thought I’d add it.
More info:
| |
- AvailableSecurityProperties - list of features that the hardware supports
- 1 - BaseVirtualizationSupport (CPU supports virtualization)
- 2 - SecureBoot (UEFI supports Secure Boot)
- 3 - DMAProtection (chipset supports IOMMU)
- 4 - SecureMemoryOverwrite
- …
- RequiredSecurityProperties - mandatory VBS features
- 1 - virtualization
- 2 - Secure Boot
- 3 - DMA Protection
- SecurityServicesConfigured - configured VBS services (configured doesn’t mean running)
- 1 - Credential Guard
- 2 - HVCI
- 3 - Secure Launch
- 5 - Kernel Stack Protection
- SecurityServicesRunning - VBS services that are running
- 1 - Credential Guard
- 2 - HVCI (Hypervisor-enforced Code Integrity); Memory Integrity
- 3 - System Guard Secure Launch; Firmware Protection
- 4 - not used
- 5 - Kernel-mode Hardware-enforced Stack Protection (KernelShadowStacks)
- VirtualizationBasedSecurityStatus - VBS status
- 0 - VBS is disabled
- 1 - VBS is enabled but not running
- 2 - VBS is running and working
And a command for beautiful output (by AI):
| |
What if? (Windows 11)
What if you disabled everything, used your VM, enabled it all back, but then decided to use the VM again, and repeating this cycle, but:
You cannot change the settings. In this case, just skip the step with disabling the settings in Core Isolation and move on.

- How to Disable Hyper-V in Windows 11 24H2 – Broadcom
- VM using native API instead of AMD-V – VirtualBox Forum
- Win11 build 22581 broke VB by enabling Credential Guard – VirtualBox Forum
- How to Remove Green Turtle icon in virtual box Windows 11 24h2 – YouTube
- I always get the turtle – Reddit
- Secure boot enabled but not active for windows 11 – Reddit